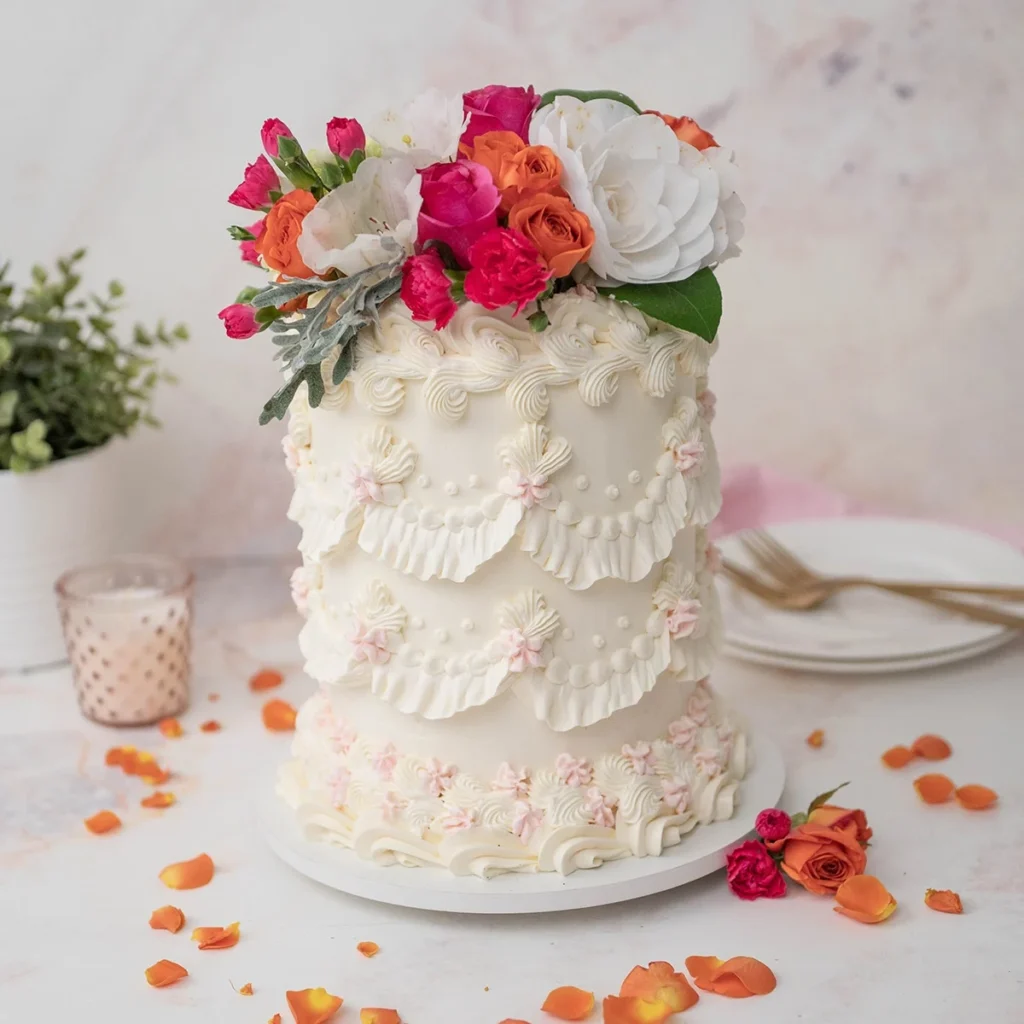
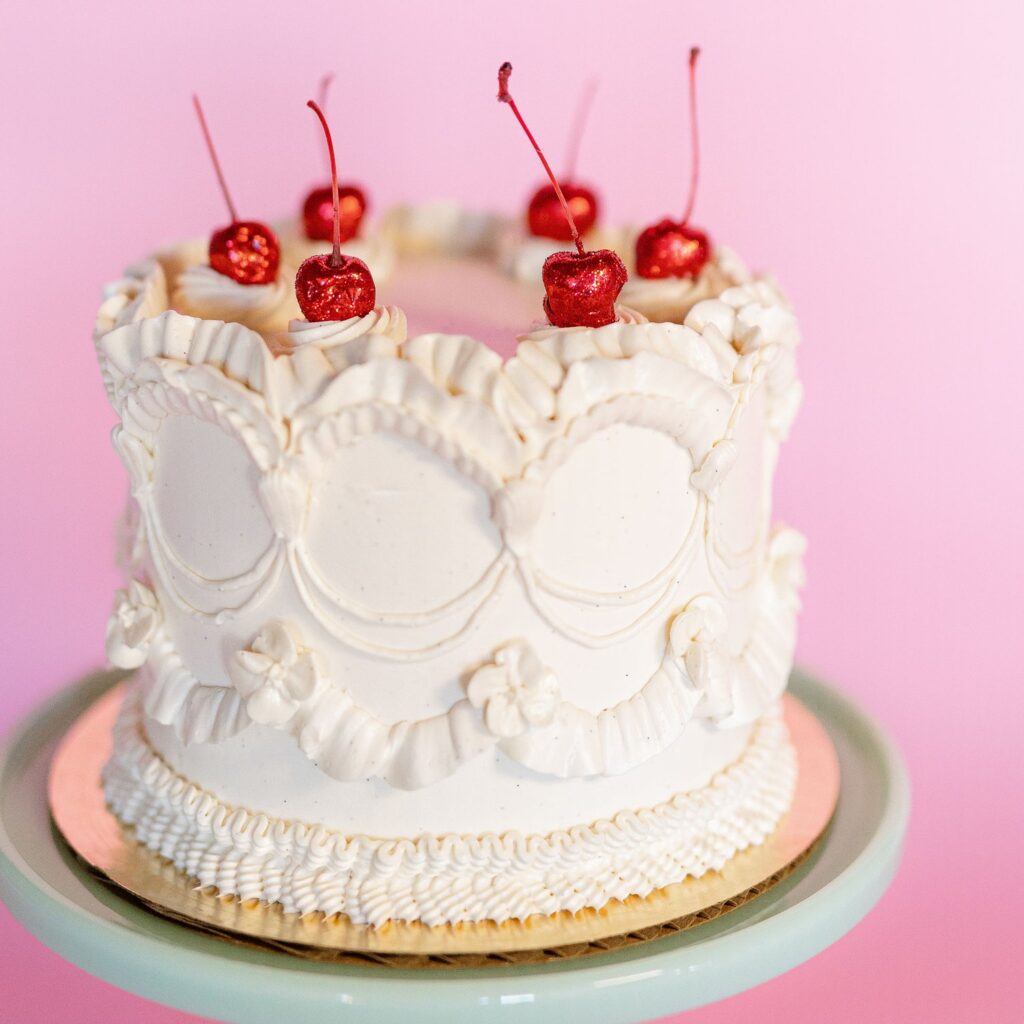
Retro Buttercream Cake

🛒 Ingredients (8″ round, 2 layers)
Cake:
- 2 cups all-purpose flour
- 1½ cups sugar
- 1 tsp baking powder
- ½ tsp baking soda
- ½ tsp salt
- ½ cup unsalted butter, softened
- ¾ cup milk
- 2 large eggs
- 1 tsp vanilla extract
Buttercream:
- 1½ cups unsalted butter, softened
- 4 cups powdered sugar, sifted
- 2–3 tbsp milk or cream
- 1 tsp vanilla extract
- Food coloring (pastels or retro hues)
👩🍳 Instructions
- Bake the Cake
- Preheat oven to 350 °F (175 °C). Grease two 8″ round pans.
- Cream butter and sugar until light and fluffy. Beat in eggs one at a time.
- Stir in vanilla. Alternate adding flour mixture and milk, beginning and ending with flour.
- Divide equally between pans and bake 22–25 min until a toothpick comes out clean. Cool completely on racks.
- Make Buttercream
- Beat butter until creamy. Gradually add powdered sugar, mixing well.
- Add milk and vanilla, beating until smooth and spreadable.
- Divide into bowls and tint with your chosen colors.
- Assemble & Crumb Coat
- Level cakes if needed.
- Place one layer on a cake board or plate, add a layer of buttercream, top with second cake.
- Crumb-coat with a thin layer of buttercream and chill for 20–30 minutes.
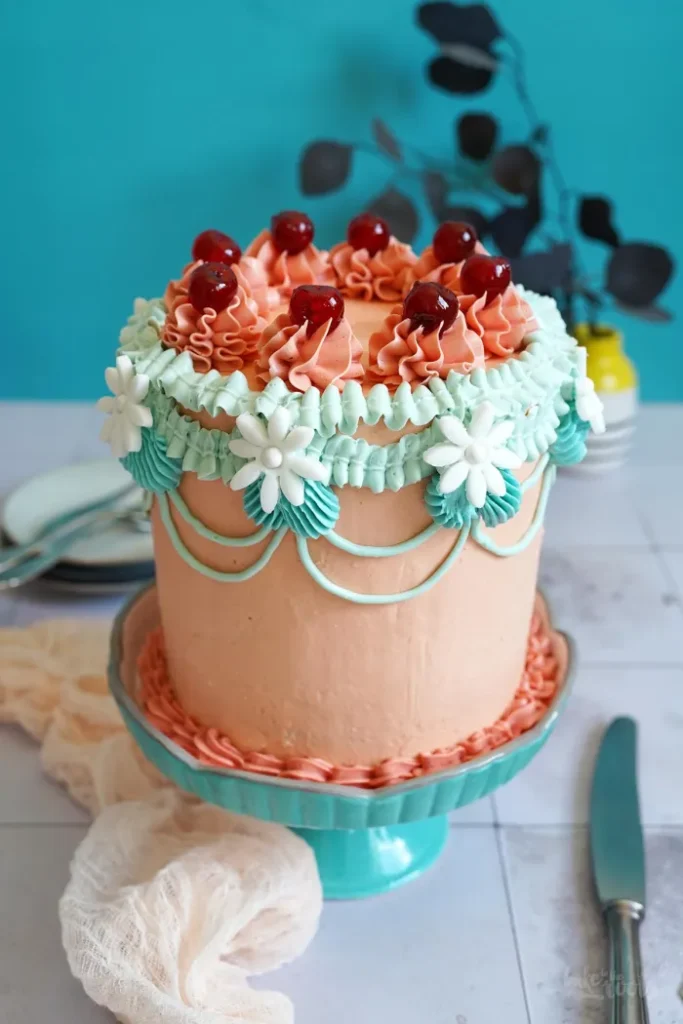
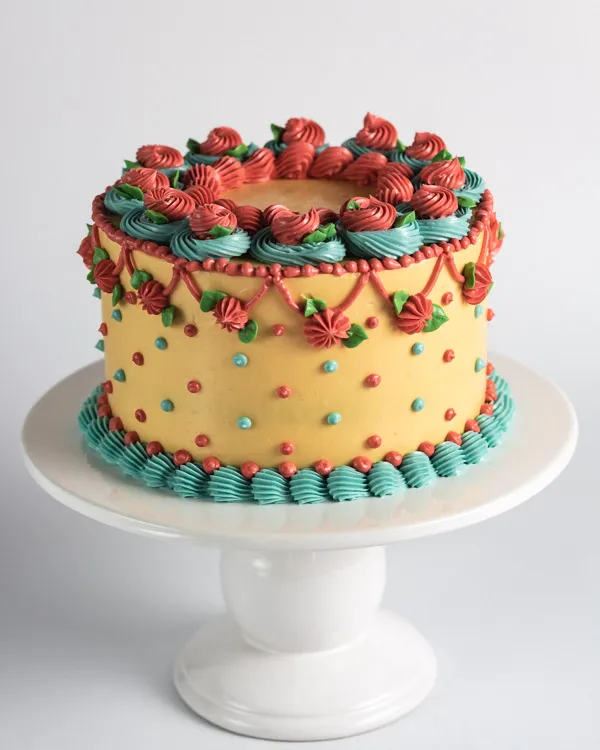
- Retro Piping Decorations
- Use a piping bag with star, petal, and round tips to create:
- Shell borders (Star tip, e.g., #21)
- Swags or draped scallops (Petal tip, e.g., #104)
- Rope or dots (Round tip)
- Pipe in tiers, cooling between colors/layers to set details
- Top with buttercream flowers, fruit (like cherries), or vintage accents
- Use a piping bag with star, petal, and round tips to create:
- Chill & Serve
- Chill to set decorations.
- Serve at room temperature for best flavor.